

In my last post I wrote about receiving a new kiln for my birthday. I've had a chance to put it through its paces since then. Before using the kiln to fire any actual ceramic work you are supposed to fire it empty one time and check to see if the heat work, (heat over time) is accurate or needs adjusting.
You do this use by using cones - no, not the kind that you want on a hot day. The cones you see in the picture below measure if your kiln is heating properly. There are different cones for different heat levels.

I was online chatting with AJE team member, Karen Totten, during my test firing. We could both hardly wait to see the outcome. I opened my kiln and Wha???? None of them were bent at all. Panic! We tried to figure out what had gone wrong. Turns out that in my excitement I had set the temperature wrong. Without going into a long explanation, there is a huge temperature difference between cone 05 and cone 5. I'd set it at cone 05. I knew better, but goofed up anyway. Well better to have an operator error than a flaw in the kiln! Here are the cone results, from the second firing.


I did a firing this week with 2 different clay bodies. There were some earthenware beads that can be glazed at cone 05 and some stoneware that is bisque fired at 05.

The red clay is stoneware that is ready to be bisque fired. Unfortunately I accidentally broke the large snowflake wall hanging when I lifted it off this tray to place it in the kiln.
The glazed pendants are also stoneware. I had glazed fired them last
week, but hadn't put the glaze on thickly enough and they needed
touching up. Because they had been glaze fired already, I had to fire them at a lower heat for the touch ups (with Mayco Coat & Stroke glaze). The glazed earthenware beads can be glaze fired at cone 05, too.
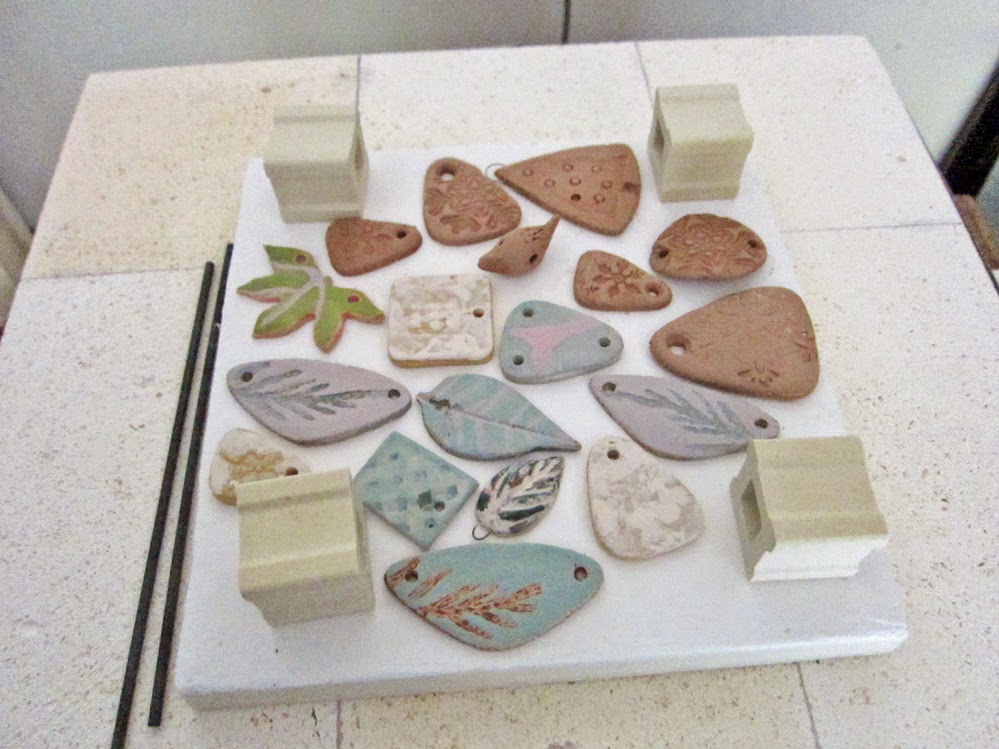
My kiln is built in layers, so it is easy to load. I took off the top layers (see above) and put some of the pieces on the bottom shelf. These pieces do not have glaze on their backs, if they did, the glaze would fuse to the shelf, ruining both the shelf and the pendants.

The earthenware beads have glaze on all sides, so they are suspended on a bead rack. Notice how they are spaced. If they touch one another, they will fuse together. Once everything was in place, I replaced the top two layers of the kiln and started the heat.

The results? The rounded triangle pieces didn't turn out very well. They are fine structurally, but boring looking. They will get banished to this tin.

The red clay snowflakes look promising. I've used white Mason Stains on some of them. I still need to wipe back a bit more of the white from the raised areas, but you can get an idea of what they will look like when they are glaze fired.

And here are the glazed beads. Some of the beads, especially the brown ones, still need more coats of glaze. Obviously its a matter of learning as I go. I made a few simple beads in Christmas colors, but I especially like the blue color. I went to a pottery store yesterday and got *more* colors of glaze. Oh my, I see the beginning of a new color addiction...

-Linda

Hi Linda, thanx for sharing. I enjoyed seeing your process. My favorite is the blue dotted piece.
ReplyDeleteVery interesting post. I liked hearing about all that goes into firing your beads and pendants. I love the pink and white ones!
ReplyDeleteSo much fun to see the steps you're going through while learning about Ceramics. The Fugly bucket is a crack up! I love your new creations!!
ReplyDeleteThank you for sharing your adventures in ceramics Linda, I like the snowflake pendants.
ReplyDeleteTherese
Linda - Thank you for sharing from the other side of the state. It has been so fun following your process. I had no idea of how much you had to do with a new kiln.
ReplyDeleteOMG how fun!! I am so excited for you and reading your post is making me want to go make beads too! I think we may have the same snowflake stamp. Mine look like that too. Hah! I'm having a lot of fun too- how neat that we are leaning this at the same time. I am enjoying your posts and seeing your progress. Thanks so much for sharing! I can't wait to see whats next! :-)
ReplyDeleteYay, look at those gorgeous beads!
ReplyDelete